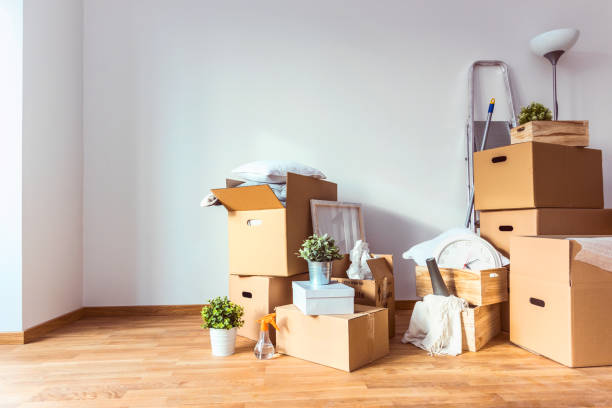
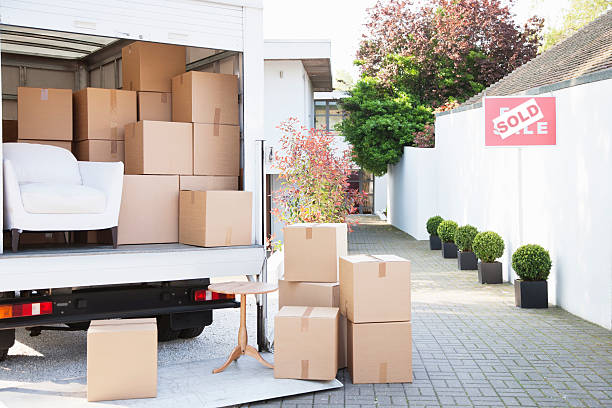
Moving into a new home after an interstate relocation can be both exciting and overwhelming. While the process of unpacking and settling in takes time, focusing on key post-move tasks can ease the transition and help you feel more comfortable in your new space. Here’s a closer look at the essential things to do after moving to your new home.
Inspect Your New Home
Before fully unpacking, take some time to assess the condition of your new property. Whether it’s a rental or your own purchase, ensuring everything is in order is critical.
- Check for damages: Look for issues such as leaks, cracks, or electrical malfunctions that may have occurred since the inspection (if applicable).
- Verify appliances: Test major appliances like dishwashers, washing machines, and HVAC systems to confirm they’re operational.
- Review safety features: Ensure smoke detectors, carbon monoxide detectors, and fire extinguishers are functioning properly.
A thorough inspection helps you identify any immediate repairs or adjustments needed before settling down fully.
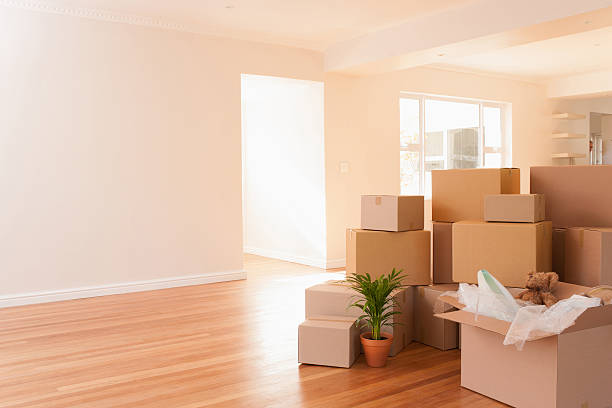
Prioritize Unpacking Strategically
- Start with essentials: Focus on opening boxes containing items you’ll need daily—such as toiletries, kitchen supplies, clothing, and bedding.
- Room-by-room approach: Tackle one room at a time rather than scattering efforts across different areas.
- Organize as you go: Avoid clutter by organizing items in their designated spots immediately after unpacking.
Breaking down unpacking into smaller steps will help make the process more manageable.
Change Locks for Security
- Change all exterior door locks or rekey them for peace of mind.
- Test all windows and doors to make sure they close securely.
- Consider installing smart locks or upgrading security systems if needed.
Investing in home security ensures that you have full control over who has access to your property.
Deep Clean Your Space
- Sanitize kitchens and bathrooms thoroughly with disinfectants.
- Dust ceilings, baseboards, vents, and light fixtures.
- Steam-clean carpets or mop hard floors before arranging furniture.
Deep cleaning not only creates a comfortable environment but also eliminates any lingering dust from prior occupants or movers.
Familiarize Yourself with Utility Systems
| Utility/System | What to Check | Action Steps |
| Water Shutoff Valve | Locate it for emergencies | Test it works properly |
| Circuit Breaker Panel | Identify labeled switches | Understand which controls each area |
| Thermostat | Check heating/cooling settings | Adjust preferences accordingly |
Knowing these basics reduces stress when unexpected issues arise.
Meet Your Neighbors
- Introduce yourself: A simple hello goes a long way toward establishing rapport with neighbors.
- Attend neighborhood events: Local gatherings provide opportunities to get involved in community activities.
- Join online groups: Platforms like Facebook or Nextdoor connect residents virtually for updates about local happenings.
Creating strong connections fosters both social support systems and valuable local knowledge over time.
Being mindful of these initial steps will help set up an organized foundation as you adapt to life in your new home after an interstate move while reducing stress commonly associated with this transition phase.
Key Tips for Long Distance Movers to Manage Utilities and Services After a Move
Transitioning to a new home after an interstate move involves many logistical tasks, one of the most important being the management of utilities and essential services. Setting these up promptly ensures that your household operates smoothly from the moment you arrive. Below is a guide to help you navigate this process efficiently.
1. Create a Checklist of Necessary Utilities
Before moving, compile a list of essential utilities and services you’ll need at your new residence:
– Electricity
– Water and Sewage
– Gas (if applicable)
– Internet and Cable Services
– Trash Collection and Recycling Services
Organizing this list in advance provides clarity on what needs to be addressed upon arrival.
2. Research Local Utility Providers
In many cases, utility providers vary depending on your location. Research local providers before moving so you can identify options for each service. Look into:
– Rates and pricing plans offered by different companies.
– Customer reviews for service reliability.
– Any special offers or incentives available for new customers.
Some areas may only have one provider per utility, so check any state or city-specific regulations regarding service availability.
3. Set Up Accounts Before Moving In
To avoid delays in accessing utilities, arrange accounts with providers before your move-in date:
– Contact each utility company early—ideally 2–3 weeks prior to relocating—to schedule activation dates.
– Provide them with your move-in date as well as any necessary documentation, such as proof of residence or identification documents.
Some services like electricity and water might require meter readings to ensure accurate billing from the start.
4. Cancel or Transfer Existing Accounts at Your Old Address
| Service Type | Action Required | Notes |
| Electricity & Gas | Request final reading & terminate account or transfer it to the new address | Verify final bill cycle dates |
| Internet & Cable | Notify provider about relocation; inquire about transferring equipment | Return any rented modems/routers if applicable |
| Trash Collection | Stop services at old address; set up collection at new property | Check if trash pickup is managed by HOA |
This step prevents unnecessary charges after you leave your previous home.
5. Test All Utilities Upon Arrival
Once you’ve moved in, verify that all utilities are functioning properly:
– Check light fixtures, outlets, and appliances connected to electricity.
– Test faucets and plumbing systems for water pressure issues or leaks. – Confirm internet speed meets expectations based on the plan selected.
If something isn’t working as expected, contact the service provider promptly for troubleshooting or repairs.
6. Monitor Your First Bills
Review initial bills carefully after setup is complete: – Ensure charges align with quoted rates. – Verify there are no unexpected fees related to installation or activation. – Reach out immediately if discrepancies arise in usage estimates versus actual consumption.
By taking these steps during your transition process, managing utilities becomes less stressful while helping avoid interruptions that can disrupt daily life in a new environment.
Finding Reliable Cross Country Movers: A Key Step After Your Interstate Move
Moving to a new state comes with numerous responsibilities, one of which is updating your address with the necessary institutions. Failing to update your address promptly can lead to missed correspondence, lapsed services, and even potential legal issues. Here’s a comprehensive guide to ensure this critical task is handled efficiently.
Why Updating Your Address Matters
Updating your address ensures uninterrupted services and compliance with state laws. Additionally, it prevents vital communications from being sent to your old address and protects sensitive information from falling into the wrong hands.
Where to Update Your Address
- USPS: Submit a change of address request through the United States Postal Service (USPS). This can be done online or in person.
- Department of Motor Vehicles (DMV): Update your driver’s license and vehicle registration within the timeframe required by your new state.
- Voter Registration: Update your voter registration details to ensure eligibility in future elections.
- Your bank or credit union
- Credit card providers
- Loan servicers (e.g., mortgage or student loans)
- Investment accounts and retirement plans
- Notify doctors, dentists, and specialists.
- Update hospitals or clinics where you may have ongoing medical records.
- Inform health insurance providers for accurate billing and coverage continuity.
- Electricity, gas, water, and internet providers should be notified promptly.
- Subscription services like streaming platforms or magazines need updated billing details.
- Inform your employer’s HR department for payroll adjustments.
- Notify educational institutions if you have children enrolled in school.
- Membership-based organizations such as gyms or professional associations.
- Online shopping accounts like Amazon or eBay for accurate delivery addresses.
Step-by-Step Guide to Changing Your Address
- Start with USPS by filing a Change of Address form: | Method | Details | |—————|——————————————-| | Online | Visit USPS Website | | In-Person | Visit any local post office |
- Create a checklist of all necessary updates based on the categories above.
- Most changes can be made online using forms within account settings.
- For official documents like licenses or voter registration, you may need to visit physical offices or mail paperwork.
- Keep receipts or confirmation emails as proof that updates were processed.
- Confirm whether mail redirection is functioning properly by checking if expected mail has arrived at your new home.
Tips for Staying Organized During This Process
- Use spreadsheets or apps like Google Sheets to track completed updates versus pending ones.
- Prioritize time-sensitive updates (e.g., DMV deadlines).
- Safeguard personal information when submitting forms—ensure websites are secure (look for HTTPS).
By prioritizing this task early in the moving process, you’ll reduce stress while ensuring smooth transitions for all aspects of daily life in your new home state.
Tips from Interstate Movers on Securing Your New Home After a Relocation
Relocating to a new home in a different state is an exciting milestone, but it also requires careful attention to security. Ensuring the safety of your new residence should be a top priority. Below, we outline key steps you can take to secure your home effectively after an interstate move.
1. Change the Locks and Secure Entry Points
One of the first tasks after moving is updating all locks in your new home. This includes exterior doors, windows, and even garage doors.
- Hire a locksmith: A professional locksmith can replace or rekey all exterior door locks, ensuring no one else has access.
- Upgrade locks: Consider upgrading to smart locks or deadbolts for added security.
- Inspect windows: Ensure all windows are properly secured with functioning locks.
2. Install a Home Security System
A robust security system provides peace of mind and deters potential intruders.
- Research options: Look into options such as monitored alarm systems, video doorbells, and motion detectors.
- DIY vs Professional Installation: Decide whether to install the system yourself or hire professionals for installation.
- Smart technology integration: Many modern systems allow you to monitor your home via smartphone apps for real-time alerts.
3. Evaluate Outdoor Lighting
Proper outdoor lighting not only increases visibility but also helps deter criminal activity.
- Install motion-sensor lights: These lights activate when movement is detected around your property.
- Add pathway lighting: Illuminate walkways, driveways, and entrances for better visibility at night.
- Use timers or smart bulbs: Automate lighting schedules so that your home appears occupied even when you’re away.
4. Check Doors and Windows for Weaknesses
Many burglars gain entry by exploiting weak points in doors or windows.
| Security Feature | Recommended Action |
| Door frames | Reinforce weak frames with strike plates or metal braces |
| Sliding doors | Add a rod in the track or install auxiliary locks |
| Window security film | Apply shatter-resistant film to prevent break-ins |
5. Get to Know Your Neighbors
Building relationships with neighbors can play an essential role in maintaining security within your community.
- Introduce yourself: A friendly introduction helps establish trust and rapport with nearby residents.
- Neighborhood watch: Inquire if there’s an established neighborhood watch program you can join.
- Exchange contact information: Share numbers with trusted neighbors for emergencies.
6. Secure Wi-Fi Networks
With smart devices becoming integral to modern homes, securing your internet connection is critical.
- Use strong passwords: Create unique passwords for all Wi-Fi networks.
- Enable encryption: Use WPA3 encryption protocols for better network protection.
- Update firmware: Keep routers and connected devices up-to-date with the latest software patches.
7. Conduct Regular Maintenance Checks
Routine maintenance ensures that all safety measures remain effective over time.
Checklist of Tasks: 1. Test smoke detectors and carbon monoxide alarms monthly. 2. Inspect cameras and other electronic devices periodically for proper functionality. 3. Replace batteries in alarm systems as needed.
By following these steps immediately after moving into your new home, you’ll create a safer environment for yourself and your family while enjoying peace of mind in this exciting new chapter of life.
Settling In After Hiring a Long Distance Moving Company: Tips for Getting Familiar with Your New Neighborhood
Relocating to a new neighborhood after an interstate move can be both exciting and overwhelming. Taking the time to familiarize yourself with your surroundings not only helps you feel more at home but also enables you to integrate into the community effectively. Below are practical tips for settling into your new neighborhood.
Explore the Area
Start by exploring your new surroundings. This step will help you identify essential services, landmarks, and entertainment options nearby.
- Take a Walk or Drive Around: Spend some time walking or driving around your neighborhood to familiarize yourself with local streets and shortcuts.
- Locate Key Establishments: Make note of nearby grocery stores, pharmacies, hospitals, schools, gas stations, banks, and post offices.
- Discover Recreational Spots: Identify parks, gyms, community centers, or other recreational facilities where you can unwind or socialize.
Connect with Neighbors
Building connections in your new community is essential for feeling at home. A friendly introduction can open doors and provide valuable insights about the area.
- Introduce Yourself: Knock on neighbors’ doors to introduce yourself or strike up conversations if you meet them in shared spaces like mailboxes or parks.
- Attend Community Events: Look out for block parties, farmers’ markets, or local festivals where you can meet others and learn more about the community vibe.
- Join Social Groups: Many neighborhoods have online groups on platforms like Facebook or Nextdoor where residents share recommendations and news.
Learn Local Rules and Customs
Every neighborhood has its own set of rules and cultural norms that residents follow. Being aware of these details helps you avoid unnecessary misunderstandings.
- Check HOA Guidelines (if applicable): If you’ve moved into a neighborhood governed by a homeowner’s association (HOA), review their rules about property maintenance, parking restrictions, noise levels, etc.
- Understand Garbage Collection Schedules: Find out when trash and recycling are collected in your area so you can prepare accordingly.
- Be Mindful of Etiquette: Observe how neighbors handle things like parking etiquette or outdoor activities such as lawn care.
Research Local Services
| Service Type | How to Find Information |
| Public Transport | Check routes online or visit transit authority websites |
| Internet Providers | Compare plans from different companies in the area |
| Healthcare | Research doctors and dentists within your insurance network |
Support Local Businesses
One way to feel connected is by supporting small businesses in your neighborhood. Visit family-owned restaurants, coffee shops, hardware stores, bookstores, etc., instead of relying solely on chain stores. This not only helps the community thrive but also enriches your experience as a resident.
Stay Safe
- Install proper security measures such as alarm systems if necessary.
- Familiarize yourself with emergency contacts like local police stations or fire departments.
- Pay attention to street lighting near your residence during nighttime walks.
Getting acquainted with your new neighborhood requires time but is an important step toward establishing comfort and belonging after an interstate move.
Vehicle Registration and Updating Insurance After Moving Interstate: What You Need to Know
Relocating to a new state comes with several administrative responsibilities, including updating your vehicle registration and insurance. These tasks ensure you comply with state laws, avoid penalties, and maintain your insurance coverage. This guide outlines the critical steps for handling vehicle registration and updating insurance after an interstate move.
Understanding State-Specific Requirements
- Registration Deadlines: Most states require you to update your vehicle registration within 30-90 days of establishing residency.
- Emissions Testing: Certain states mandate emissions testing or safety inspections before registering a vehicle.
- Required Documents: Ensure you have all the necessary paperwork, such as proof of residency, your current title or registration, proof of insurance, and identification.
Check the specific requirements on your state’s Department of Motor Vehicles (DMV) website.
Steps to Update Your Vehicle Registration
- Current vehicle title/registration.
- Proof of identity (e.g., driver’s license).
- Proof of residency in the new state (e.g., utility bill or lease agreement).
- Proof of insurance that meets the state’s minimum coverage requirements.
- Complete any mandated safety or emissions inspections.
- Submit all required documents.
- Pay applicable fees for new plates or title transfers.
- Once processed, you’ll receive updated license plates and stickers for your car.
Make sure to keep a copy of the transaction receipt for your records.
Updating Your Auto Insurance Policy
- Notify your insurer about the change in address.
- Confirm whether they operate in your new state; if not, shop for a new provider licensed within that jurisdiction.
- States have different minimum liability coverage limits for bodily injury, property damage, and uninsured motorist protection.
- Some states also require Personal Injury Protection (PIP) or comprehensive coverage.
- Provide accurate information about where your car will be primarily parked.
- Adjust mileage estimates based on potential commuting changes due to relocation.
- Obtain updated proof-of-insurance cards reflecting your current address and coverage limits.
Potential Penalties for Delayed Updates
| Violation | Possible Penalty |
| Driving with Out-of-State Plates | Fines ranging from $50-$500 depending on the state |
| Operating Without Proper Insurance | Suspension of license or fines |
| Missing Registration Deadline | Additional late fees during application |
Avoid these penalties by prioritizing these tasks immediately after moving into a new state.
Tips for Simplifying the Process
- Set reminders on deadlines related to both processes upon arriving at your destination.
- Keep multiple copies of essential documents such as proof-of-residency forms.
- Research DMV wait times online—many offer appointments or online services now available post-pandemic shifts making paperwork streamlined significantly easier addressing.
Expert Tips for Packing Dishes Safely and Efficiently During a Move
Packing dishes for a move requires careful planning and the right techniques to ensure they arrive safely at your new home. Dishes are often fragile and prone to breaking during transit, so employing effective packing methods can save time, money, and stress. Below are expert tips to help you pack your dishes safely and efficiently.
Gather the Right Supplies
- Dish boxes: These are sturdy boxes specifically designed for fragile items.
- Packing paper: A soft, cushioning material to wrap individual pieces.
- Bubble wrap: For added protection around delicate or valuable items.
- Foam sheets: Useful for dividing layers of dishes within a box.
- Packing tape: Strong adhesive tape to seal boxes securely.
- Permanent markers: To label boxes with “FRAGILE” and descriptions of contents.
Having these materials ready before you begin packing can make the process smooth and efficient.
Steps for Packing Dishes Safely
- Line the bottom of the dish box with crumpled packing paper or foam padding. This will create a cushioning layer to absorb any shock during transit.
- Reinforce the box with extra tape along seams if it seems flimsy.
- Use packing paper or bubble wrap to cover each dish separately. Wrap tightly but not so tight that it could cause damage when unwrapped later.
- For plates, stack them vertically rather than horizontally in the box as they are less likely to break this way.
- Place similar-sized items together to maximize space efficiency in the box while ensuring even weight distribution.
- Use dividers like foam sheets between layers or groups of dishes.
- Avoid leaving any gaps in the box as movement within can lead to breakage. Fill empty spaces with crumpled paper, foam peanuts, or small towels for added stability.
- Seal the top of each box securely using strong packing tape.
- Clearly label each box with “FRAGILE” on all sides and indicate which room it belongs in (e.g., “Kitchen – Plates”).
Common Mistakes To Avoid
| Mistake | Why It’s Problematic | Corrective Action |
| Using regular boxes | May not be strong enough for heavy dishes | Opt for specialized dish boxes |
| Overpacking one box | Can make it too heavy, increasing risk of drops | Spread items across multiple smaller boxes |
| Skipping protective layers | Leaves items vulnerable to impact | Always use adequate padding between pieces |
Additional Tips
- Pack heavier items (such as serving bowls) at the bottom of the box and lighter items (like glasses) on top.
- If possible, transport especially valuable or irreplaceable dishes yourself rather than placing them on a moving truck.
By following these expert tips, you’ll minimize risks associated with transporting fragile dishware over long distances while staying organized throughout your move process. Planning ahead will ultimately lead to fewer headaches once you arrive at your destination.
How to Prepare and Pack Delicate Paintings for a Long-Distance Move
When moving interstate, transporting delicate paintings and artwork requires special attention. Proper preparation and packing not only safeguard the value of your paintings but also ensure their safe arrival at your new home. Below is a comprehensive guide to help you handle this process effectively.
Gather Necessary Packing Materials
To pack delicate paintings securely, collect the following supplies in advance:
– Custom-sized moving boxes or mirror/artwork boxes. – Bubble wrap for cushioning. – Packing paper for an added layer of protection. – Corner protectors made of foam or cardboard. – Packing tape (heavy-duty). – Stretch wrap or plastic wrap. – Optional: Acid-free paper or glassine for preserving artwork directly.
Step-by-Step Guide to Packing Paintings
- Determine whether the painting is framed (with or without glass) or unframed. Each type may require slightly different techniques.
- If your painting is framed with glass, clean the glass surface gently. This helps reduce dirt transfer during packing.
- Inspect the frame and artwork for any pre-existing damage so you can document it before packing.
- Place a layer of painter’s tape in an “X” pattern across the glass surface. This minimizes shattering if the glass breaks during transit.
- Wrap the entire frame in plastic wrap to provide additional stability.
- Use acid-free paper or glassine to cover delicate surfaces directly (especially valuable oil paintings). This prevents smudging and damage from moisture or dust.
- Add a layer of bubble wrap around the artwork, securing it tightly with packing tape.
- Slip foam or cardboard corner protectors onto all four corners of framed paintings to shield them from impact during handling.
- Select a box slightly larger than the painting itself (specialty art/mirror boxes work best).
- Fill any empty gaps within the box using crumpled packing paper, ensuring that there’s no room for movement inside once sealed.
- Close and secure all seams with heavy-duty packing tape.
Special Considerations for Unframed Paintings
Unframed pieces need extra care as they’re more vulnerable:
– Roll canvas paintings carefully, if permitted by their material type, using a protective tube lined with acid-free paper. Ensure minimal pressure while rolling. – For flat unframed pieces that cannot be rolled, follow similar steps as framed artworks but place them between two sturdy pieces of cardboard before boxing them up.
Labeling Matters
Clearly label each box containing paintings as “Fragile.” Indicate which side should remain upright by marking arrows on all sides of the box. This ensures movers handle these items correctly during transportation.
Storage During Transit
If your move requires temporary storage services:
– Avoid extreme temperature fluctuations by choosing climate-controlled facilities.
– Cover stored items with breathable materials instead of plastic to prevent condensation damage over time.
By taking these precautions when preparing and packing delicate paintings for long-distance moves, you’ll significantly reduce risks associated with damage while preserving their integrity throughout transit.
- Step-by-Step Guide to Choosing Long Distance Movers for an Efficient Interstate Move
- Essential Tips for Choosing the Best Long Distance Movers Successfully
- Key Things to Know About Hiring an Interstate Moving Company After Relocating to Your New Home
- The Complete Guide to Long Distance Movers: Essential Tips for a Successful Transition
- 5 Essential Steps to Take After Moving to a New State with Long Distance Movers
- Essential Tips and a Checklist for Hiring Interstate Movers